This is an old revision of the document!
Table of Contents
Welcome/Apps/VividShaper/Getting started
Getting started
Historical overview
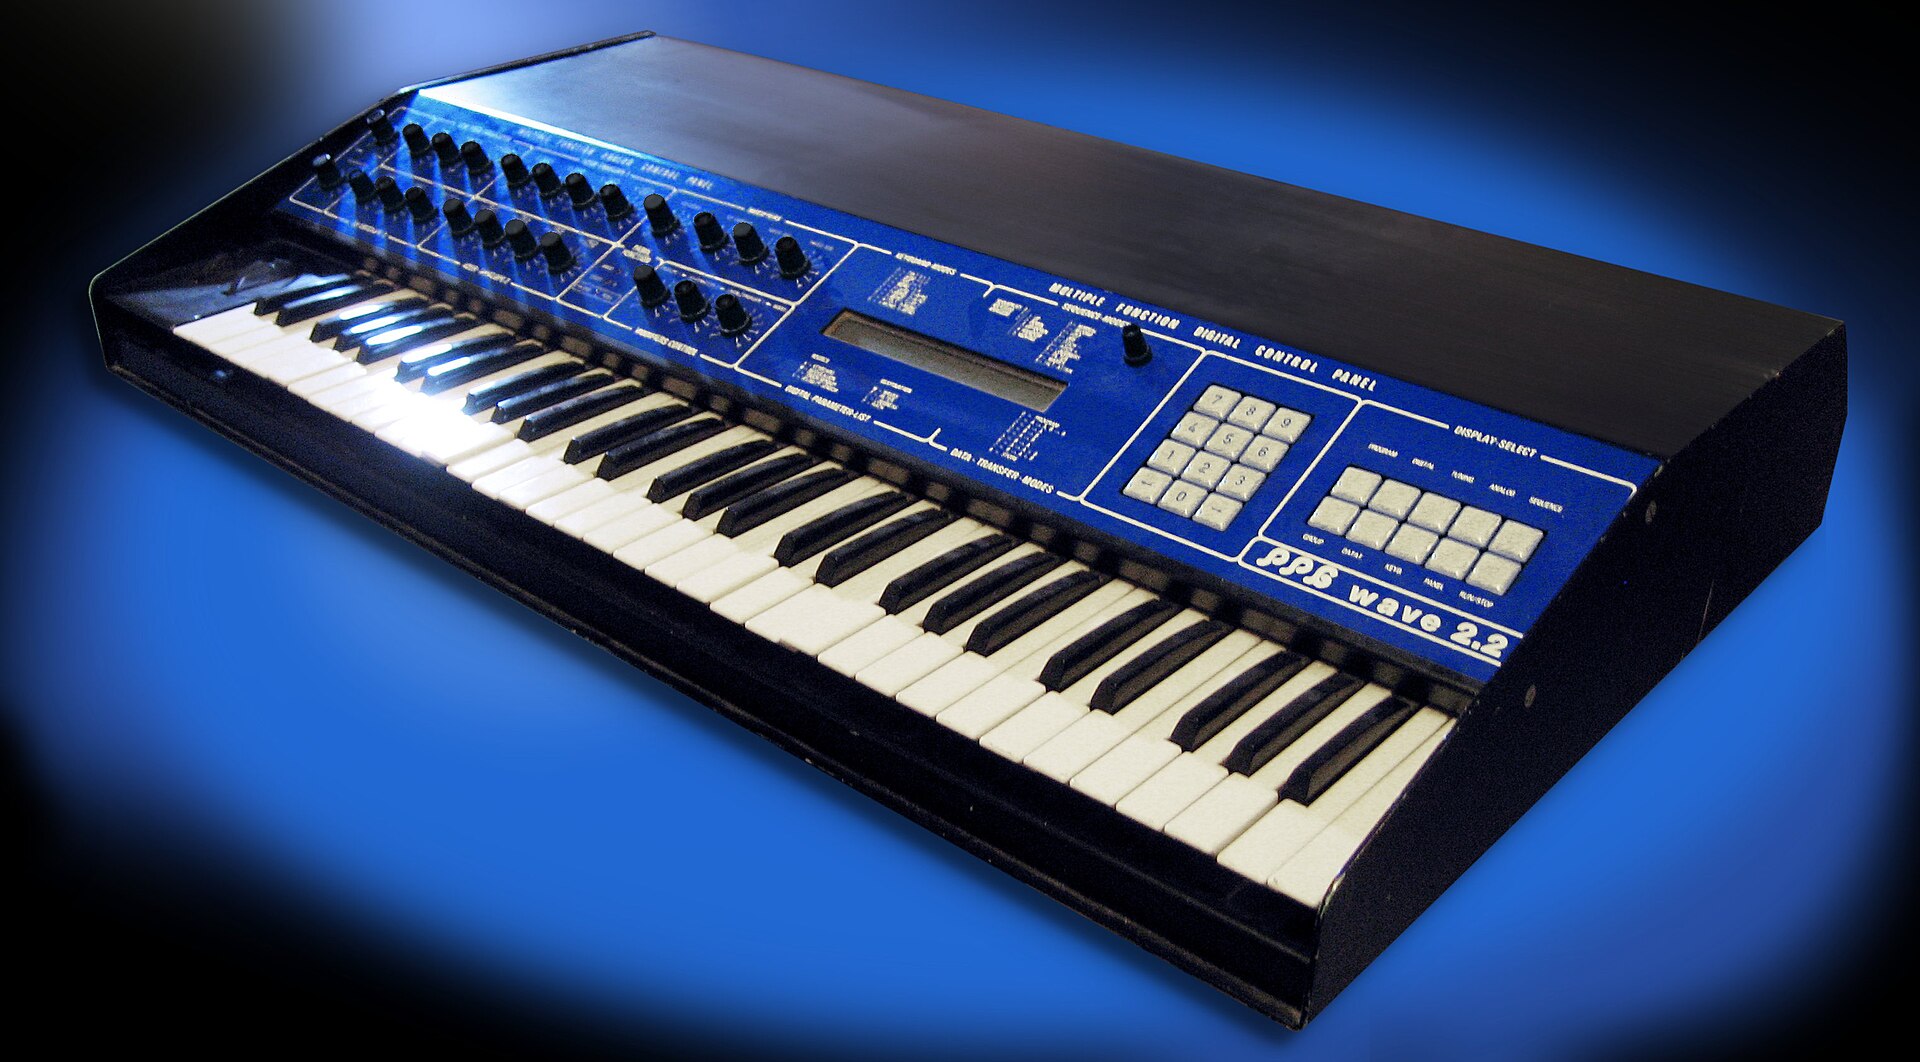
One of the first Wavetable synthesizers was the PPG Wavecomputer, which was released in 1978 and had 30 different wavetables. It was followed a few years later by the Wave 2 (1981), Wave 2.2 (1982), and Wave 2.3 (1984). Each wave had the length of 256 samples (probably one byte per sample). A wavetable is a table of waves that can be looped through to give an evolving sound. The PPG Wave 2.3 had 30 different wavetables, each consisting of 64 waves (a total of 1920 waves). With 256 samples per wave, that required a memory of 480 kB.
PPG Wave 2.2. Image licensed under CC-BY-SA-2.0. Original source: https://www.flickr.com/photos/krunkwerke/sets/72157623332441453/with/4366765092/
In addition to these wavetables, the PPG had also an analogue low-pass filter, two ADSR envelopes, and one AD envelope generator. The envelopes could not only be used for the volume, but also to instruct the oscillator to cycle through a given wavetable. It had furthermore eight voices, each with two oscillators, where each oscillator could play a different wave.
In 1986, the US synth company Sequential released their Prophet VS synthesizer. This was marketed as a “vector synthesizer”, because it could mix between different waveforms using the built in waveform joystick. The actual synth engine core was however a wavetable synthesizer, consisting of 96 factory-preset 12-bit waveforms. These waves had the length of 128 samples. It wasn't really the wavetable part that made this synth unique, but its combination of digital waves and vector synthesis. Despite this novel approach, it wasn't very successful and the Sequential company was sold to Yamaha in 1987. Dave Smith who owned the company went on to start a new company known has Dave Smith Instruments.
One would think that Yamaha bought Sequential for its innovative idea of the Prophet VS, but it was Korg that actually did something with the “vector” synth idea. They borrowed the idea of vector synthesis and made their own Korg Wavestation synthesizer (released in 1990). The Korg Wavestation is more like an hybrid between a wavetable synthesizer and a rompler, that is a synth that can play back recorded samples. However, since it has the ability to smoothly walk through different waveforms by building sequences of sounds, it may be regarded as a wavetable synth and it can for sure operate as one if the waves are short enough,
Later, in 2002, Dave Smith released his first instrument after selling Sequential to Yamaha. It was called the Evolver and it was a real wavetable synthesizer. It had the same waves as the Prophet VS, plus 32 user waves that could be uploaded via MIDI. That allowed users to create their own waves and play them back.
It should be noted that there is some misconception around the term “wavetable”. Sometimes, it is referred to a set of waves that you can loop through, and sometimes it is just referred to a single wave. Sometimes, this is then referred to as a “single-cycle” wavetable. Today, a wavetable synthesizer is just the overall technique of using very short samples that either changes dynamically or
VividShaper introduction
Today, there are many software synthesizers that have adapted the concept of wavetable synthesis, including Native Instrument's Massive, Reason Studios Europa, and Serum from xfer records. However, they are all built around the idea of predefined wavetables that you can manipulate using various effects.
VividShaper is quite different. It is a wavetable AUv3 plugin synthesizer for macOS and iOS that borrows the idea from the early wavetable synthesizers to have only 128 samples per wave, but instead of having a fixed number of waves to choose from, VividShaper lets you program and modify your waves over time using the built in Lua programming language.
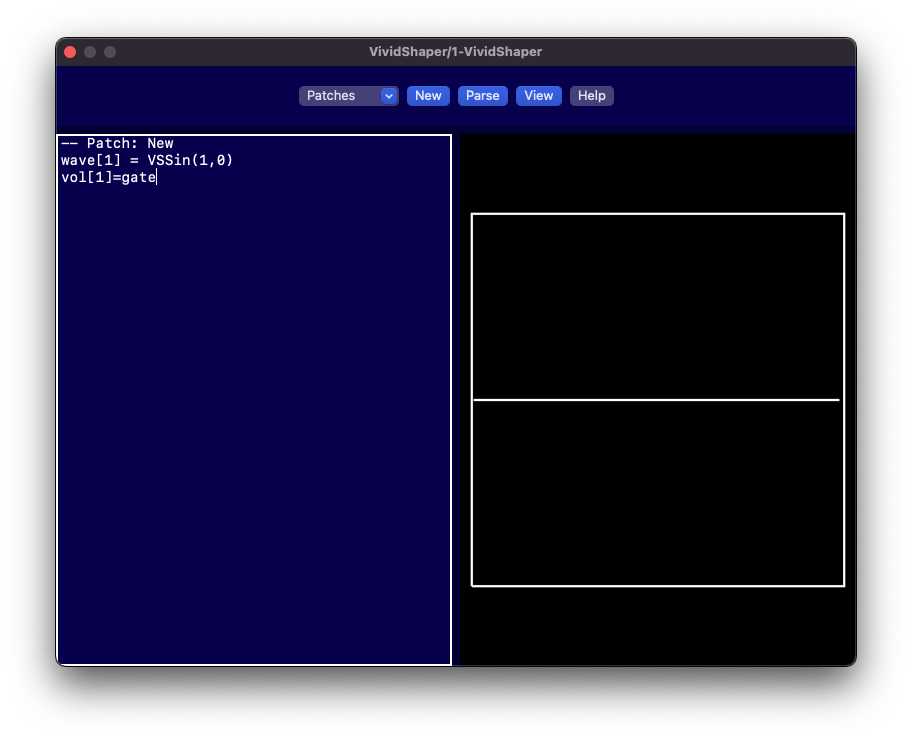
When you start the plugin for the first time, you will see a window with the Lua coding editor on the left side and a waves view on the right side.
There are only a few buttons that you can select. On the left side, there's a patch menu button that will allow you to load and save patches (either locally or to iCloud). The New button will remove anything you have written and start from the simple patch you see in the image. The Parse button is pressed when you have coded something and you want to use the new code. You can also reset the synth using the parse button. The View button will change the view of the editor and the graph (only editor, only graph view, editor left to graph, editor below graph). Finally, there is also a Help button. This button loads some text into the editor, telling which version you have and gives you a simple example.
A simple Lua program may look like this:
-- Patch: A simple example
wave[1] = VSTriangle(1,0)
vol[1] = VSADSRE(1,1,0.8,3,0,gatetimeon,gatetimeoff)
This is a slightly more advanced example than the one you get when you press the New button. Let us go through this example in detail. On the first row, you see a comment saying “– Patch: A simple exampel”. You don't need to add this row, but it will always be added as the first row in the code when you save the patch anyway. The first row always tell the name of the patch (which is equal to the filename).
Each generator has eight oscillators, where each oscillator plays one wave. A wave consists of 128 samples and the wave[] array consists of eight such wave arrays, one for each oscillator. In other words, wave[1] corresponds to the wave of the first oscillator, wave[2] corresponds to the wave of the second oscillator, and so on.
On the second row, we will call the built in function VSTriangle(frequency,phase). This function will create a new wave of 128 samples (array) and store it to the first oscillator. The frequency is set to 1 Hz, meaning it will fill the 128 samples with one cycle of the triangle wave. If we change this to e.g. 2 Hz, we will fill the wave with 2 repeating triangle waves. The phase is given in degrees (0-360) and is here set to zero.
On the third row, we set the output volume using the Attack, Decay, Sustain, Release (ADSR) envelope (VSADSRE). The E stands for Exponential release. If you don't want exponential release but a linear release, you can use VSADSR instead. They take the same arguments. The arguments are as follows:
attack = 1    -- This tells the time it takes to reach the peak volume (in seconds)
decay = 1     -- This tells the time it takes to drop from the peak volume to a sustain volume (in seconds)
sustain = 0.8 -- This sets the sustain volume (in the range from 0 to 1).
release = 3   -- This set the time it takes for the volume to drop to zero after the user released the key.
initlevel = 0 -- This tells the initial volume level when the envelope starts, i.e. when they key is pressed. Often set to zero.

vol[1] = VSADSRE(attack,decay,sustain,release,initlevel,gatetimeon,gatetimeoff)
The variables gatetimeon and gatetimeoff tells how long time it has been since the key was pressed down (gatetimeon) and released (gatetimeoff). When the key is released, the gatetimeon time freezes at that time point. This means we can sum together gatetimeon+gatetimeoff to get the total time from when the key was pressed down.
The volume output of VSADSRE is then stored to vol[1], which is the volume for the first oscillator. Since we have eight oscillators, we can store eight different volumes as well.
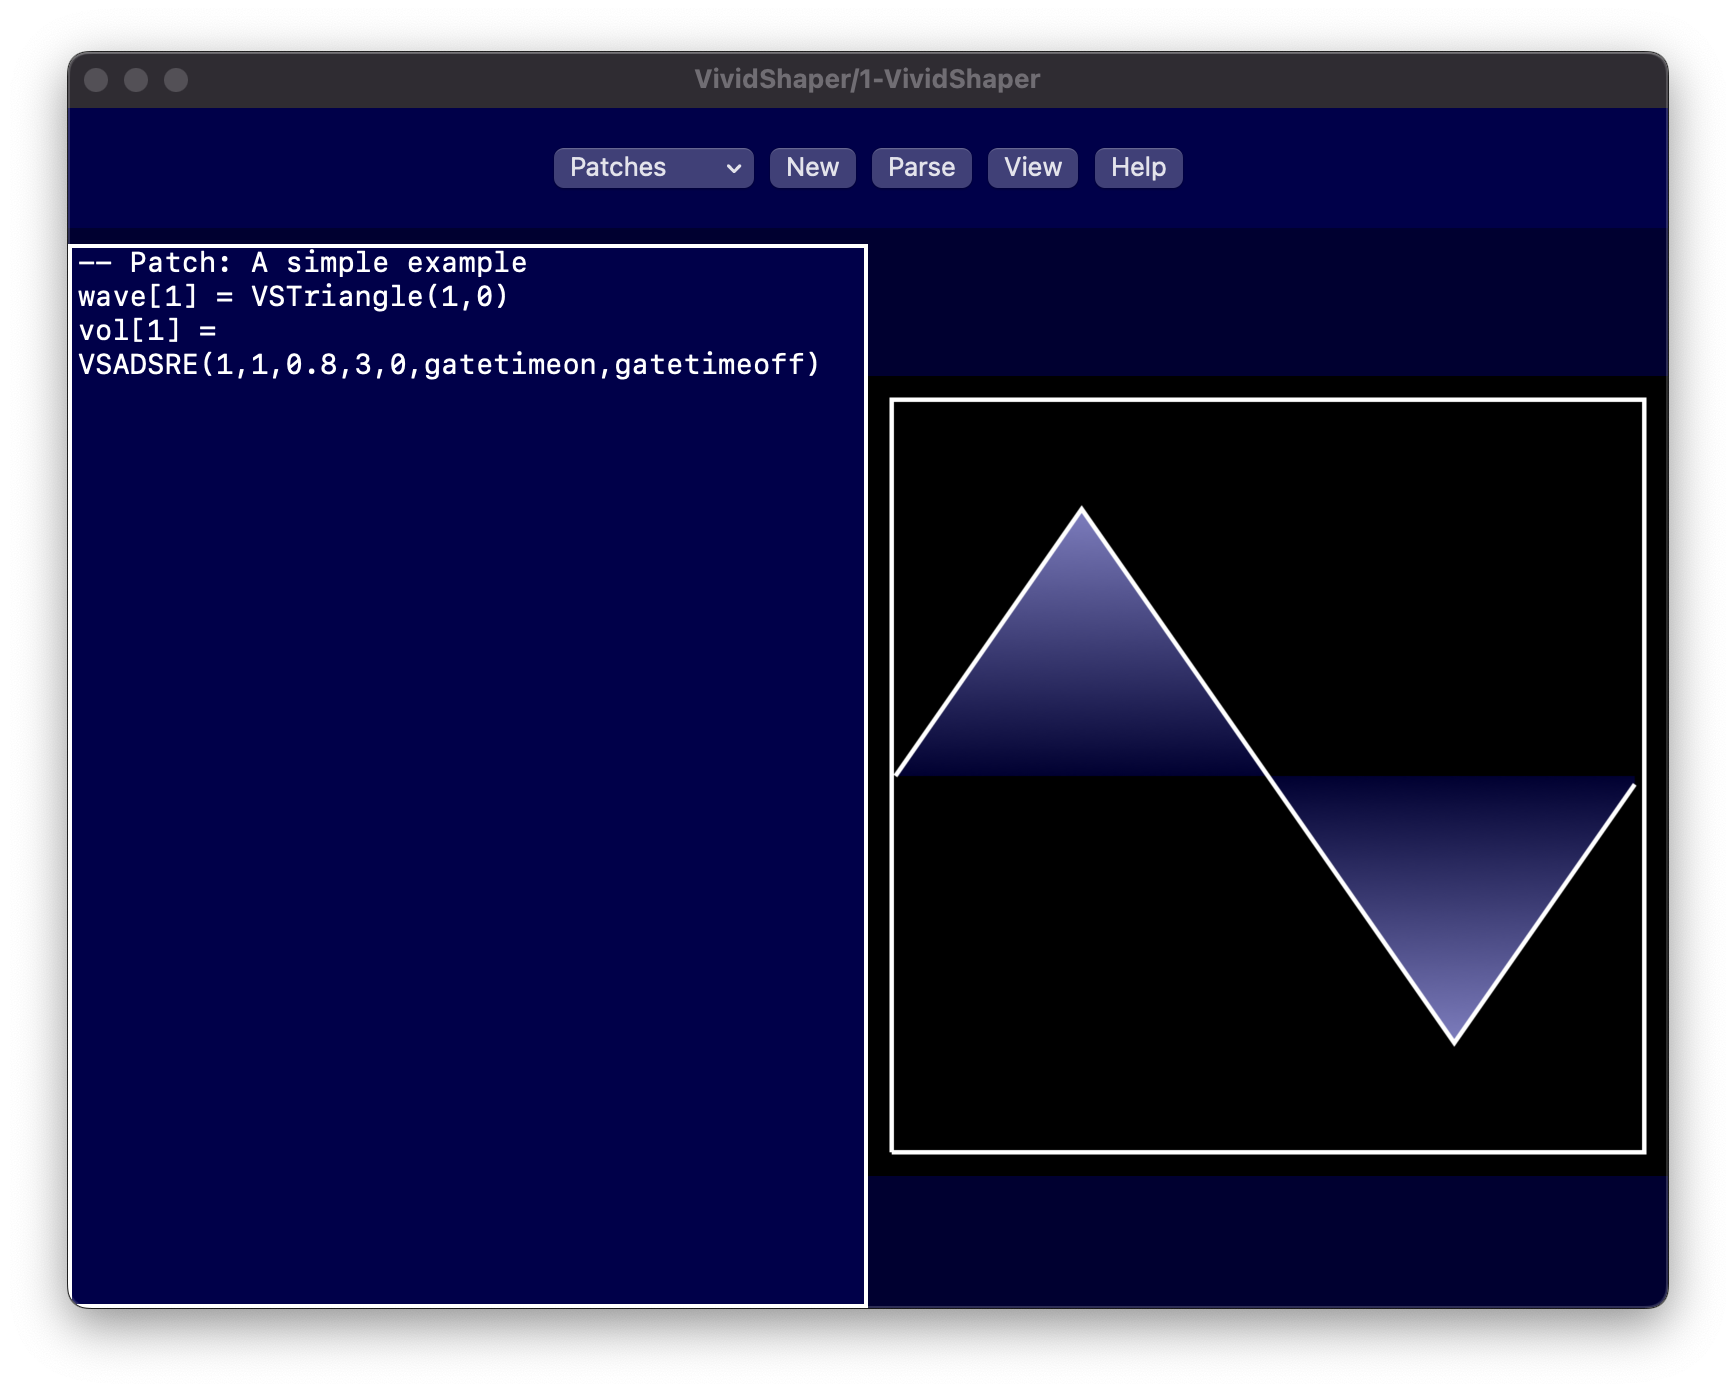
When you now play this simple patch, you will see the wave on the right side view:
Using more oscillators
Playing back just one oscillator gives a quite thin sound. If you want to get a more dynamic sound, you can add a second slightly detuned oscillator. Try out this code:
-- Patch: A simple example with two oscillators
wave[1] = VSTriangle(1,0)
wave[2] = wave[1]
vol[1] = VSADSRE(1,1,0.8,3,0,gatetimeon,gatetimeoff)
vol[2] = vol[1]

note[1] = notein + 0.01
note[2] = notein - 0.01

panning[1] = 0.25
panning[2] = 0.75
gvol = 0.5
Here, we have added another wave[2]. We have set it to the same wave form as wave[1] and we have chosen the volume (vol[2]) to be the same volume as for the first oscillator. Then, we can also set what note that should be played for each of the oscillators. The variable notein will tell the MIDI note number corresponds to the note being played. For instance, the MIDI note value 48 corresponds to C-4.
note[x] is an array corresponding to the notes being played for the eight oscillators (x is between 1-8). If we don't set note[x] explicitly, each oscillator will keep the default notein value. Hence, you don't have to set the note[] array if you don't want to change the note.
Given that notein=48, note[1] will be 47.99 and note[2] will be 48.01. Setting these two oscillators slightly detuned will create a beat effect, which you can read more about here:
https://en.wikipedia.org/wiki/Beat_(acoustics)
It is this technique that synthesizers use to create a more fatty sound. For instance, a supersaw sound is created by mixing several detuned sawtooth oscillators.
We can also set the panning of each oscillator, telling them if the sound should be played on the left speaker, the right speaker, or anything in between. This is done by setting the panning[x] array, which again is an array of eight values, one value for each oscillator. A panning value of 0 means left, a panning value of 1 means right, and consequently a panning value of 0.5 means in the middle.
Finally, we set the gvol variable to 0.5. This is the global volume that VividShaper sends to the DAW and the default value is 1. If we add more than one oscillator, it can be a good idea to lower the global volume. Otherwise, the total volume will be saturated.
Other waveforms
We have so far seen the


